Monday, November 26, 2012

A Birthday Party for our Little Madeline

Liliana's Madeline Party


Our three Madelines and one Pepito
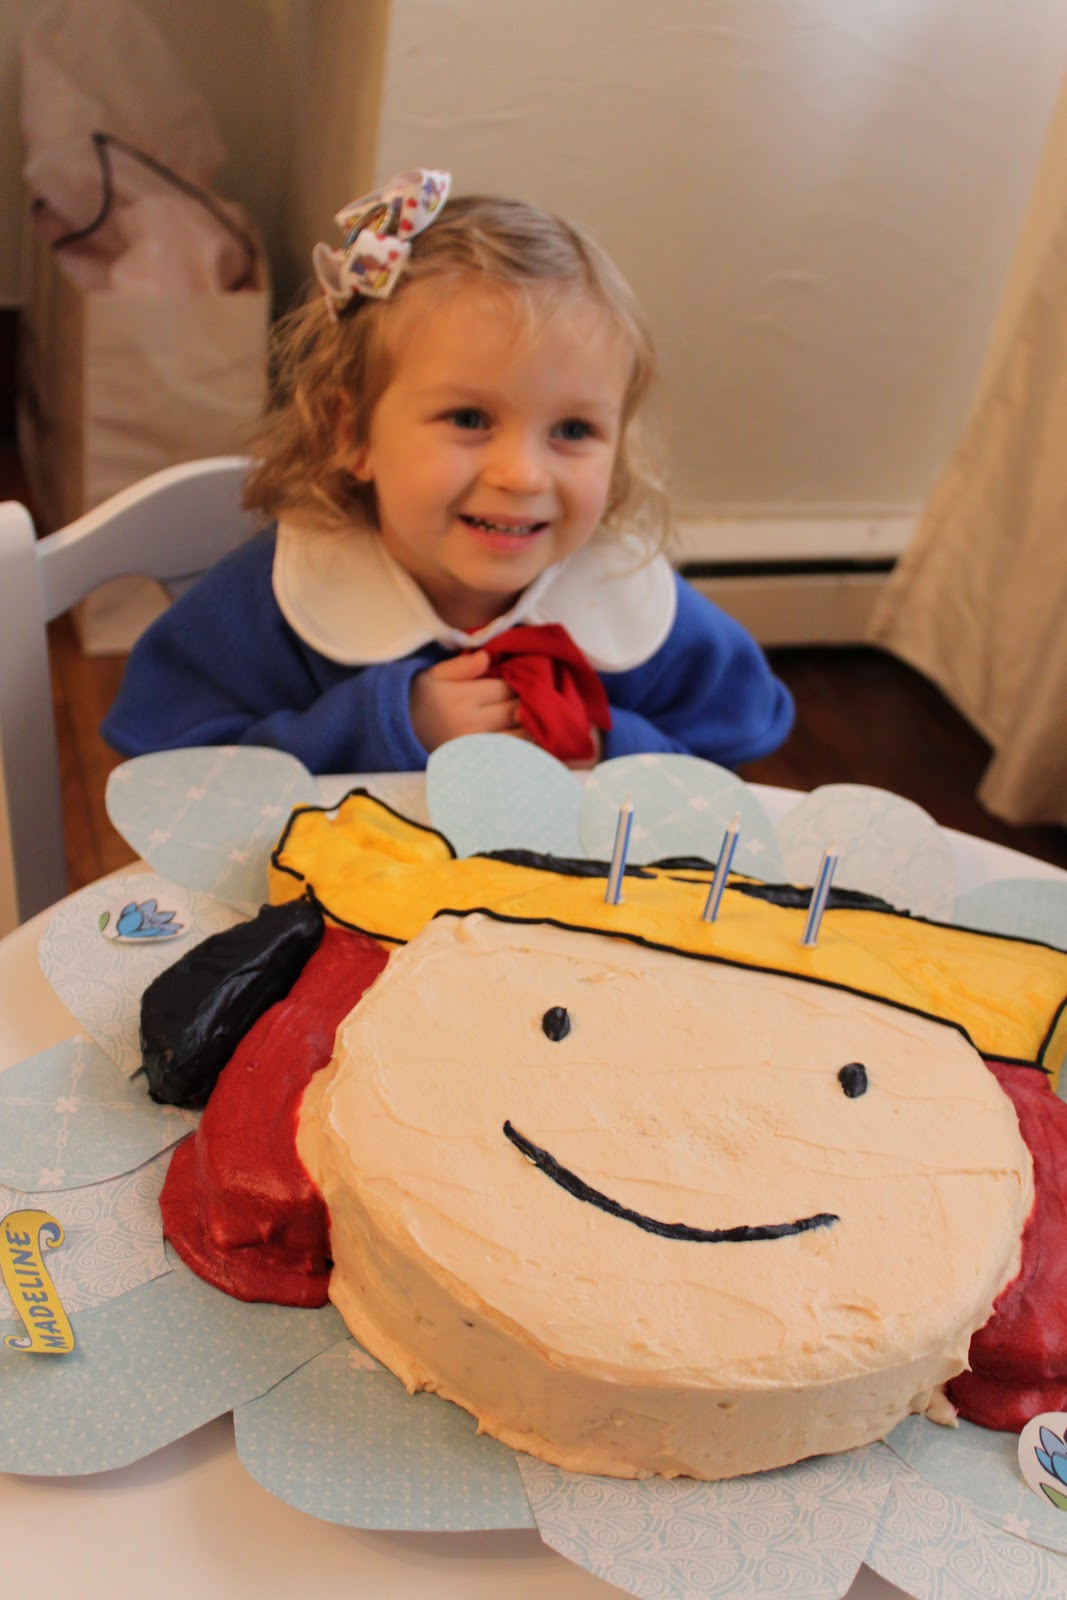
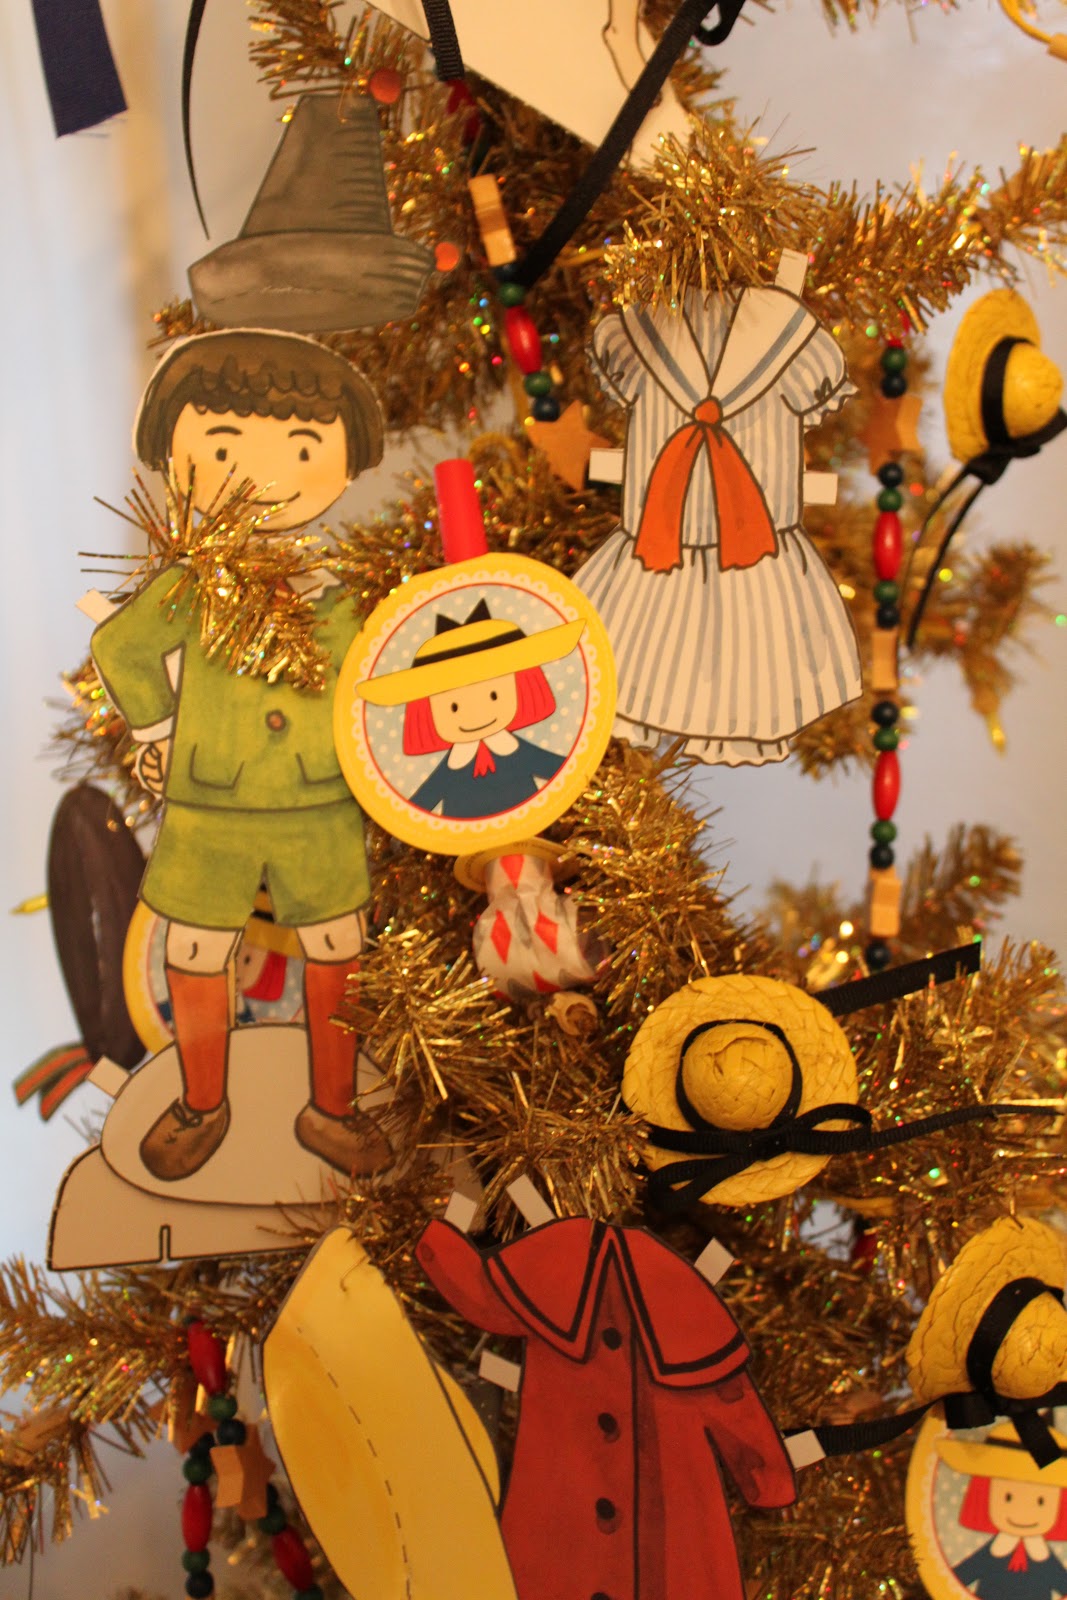
       Our house might not be "an old house in Paris that was covered in vines" but we did have a Madeline or two (actually three!) at our house this past weekend--plus a Pepito!  We had an early birthday party for Liliana since there were grandparents, cousins, and other family members home for the Thanksgiving holiday with whom we wanted to share the fun.  For her third birthday, Liliana chose to have a Madeline theme, based on the classic picture books by Ludwig Bemelmans.  (For more about the party preparations, click here.)  The girls wore Madeline coats, complete with her well-known yellow hat.  Our Pepito wore his traditional black cape and black hat (actually a child's Musketeer hat since they don't actually sell Pepito hats).  We read a few of the Madeline books, crushed a yellow hat pinata, found missing pictures on a Madeline place mat, found Genevieve's missing puppies in the Madeline in Paris board game and had a Madeline cake (with two eyes and "a happy" as Liliana called the cake's smile).  Liliana, filled with much anticipated birthday glee, flitted continually from one end of the party to the other, playing with cousins, talking with great-aunts, and started singing the "Happy Birthday" song to herself as soon as the candles were lit on the cake.  My favorite moment was when Daddy came in the door with a dozen helium-filled balloons because Liliana squealed and danced and jumped with happiness.  Brian's favorite moment was when the yellow hat pinata fell from the tree (its string broke) and Pepito never stopped swinging at that pinata, crushing it on the ground until the candy and prizes appeared.  We are very thankful for all who traveled from far and near to be a part of our celebration of Liliana.  May she spend many more happy moments with her loved ones during the coming year!
                         Pinata time!

A tired little girl wears her new knee socks and plays
 with her new Three Bears flannel graph set (after the party).

Preparing for a Madeline-themed Birthday Party

Oui! Oui! Our Liliana is Three! Preparing the Madeline Party:
 
 
       In preparation for Liliana's third birthday, I immersed myself in all things Madeline, her chosen theme.  We had lots of the Ludwig Bemelmans' books, plus puzzles and games. 
 
 
       I prepared Madeline birthday banners by making color photocopies of Madeline, pasting them onto blue and red card stock, punching a hole in the top corners of each picture, and attaching them with blue grosgrain ribbon. 


       A Madeline cake was made by using an extra-large round cake pan for a head and making an additional square cake which I cut up for Madeline's signature hat, hat streamers, and her red hair.  I iced the cake in buttercream colored with paste food colorings.  The cake was sitting on a foil-wrapped, upside-down cookie tray which I hid by adding tear-drop shaped scrapbook paper.


       Madeline cookies were made by purchasing a mini hat cookie cutter from amazon.com, then making a batch of Italian butter cookies which I glazed with yellow icing (powdered sugar with a little bit of water and yellow food coloring) while they were still hot, then piped a black bow using a small round nib on the icing bag when they cooled.


       Birthday tree decor were Madeline paper dolls from amazon.com (which I cut out and poked a pin through for the ornament hook).  I also hung lots of mini yellow Madeline hats which I made by purchasing small straw hats, spray-painting them yellow, then sewing on thin black ribbon which was tied in a bow.


       Madeline party items were purchased from birthdaypartyexpress.com and included costumes, invitations, thank yous, paper plates, cups, balloons, Eiffel Towers centerpieces, placemats, favor boxes, stickers, a yellow hat pinata, and more.  I also decorated using my own 8 inch Madeline dolls from childhood.


The Thanksgiving Table

Hosting Thanksgiving Dinner: Setting the Table


       I had the joy of hosting Thanksgiving dinner this year and it truly was such fun.  The best part of preparation, of course, is the decor.  So, after years in storage, my ten vintage turkey figurines came out of hiding and were dispersed around the livingroom, diningroom, and kitchen so Vera Rose and Liliana have daily marches around the rooms to spot and point out the turkeys.
       Food preparation (and every task) always takes a million times longer than I think it will since my toddlers are constantly underfoot and desiring attention so I decided to set the Thanksgiving table and finalize the seating chart four days in advance--and I'm so glad I did!  Midway through placing the newly ironed tablecloth and cloth napkins, and setting the plates, one of the diningroom table's legs fell off with a very loud crash.  The table didn't collapse since the table (a cherished inheritance from Brian's grandma) has eight legs (it's a double dropleaf).  The table had been excessively wobbly for a month and I blamed it on bad storage conditions and wondered whether I'd have to have the table repaired somehow.  Well, after the leg detached itself, I went underneath to investigate, only to find that every leg was missing its wingnut and washer.  Each leg was simply propped against the table with only the screw sitting loosely through the furniture.  Everytime I repositioned the table (which I do a lot), the legs would slant at 45 degree angles and wobble and twist.  Hmmm, have my little darlings been untwisting wingnuts when I thought they were sweetly playing house beneath the table?  I believe the answer is YES.  About a month ago, I spotted a number of washers and huge old wingnuts on the floor, but since I'm often using tools to put up curtain rods, etc,  I just blamed it on my own carelessness.  I fetched the missing parts from my tool basket, and tightened the legs and yay: sturdiest table ever! (at least until the next time my girls play beneath the table).


Thursday, November 15, 2012

Thankfulness Tree

We are so thankful...


       Prompted by seeing my sister and others make Thankfulness Trees in the past, we created our own little version today.  We utilized a tree branch that had been anchored in a little circle of concrete (a garage sale find from years ago), then cut out leaf shapes from orange and yellow scrapbook paper.  Then the fun began! 
       I asked Liliana what she was thankful for, what she was happy that she had, what items or people made her glad that God had given them to her...and as you can imagine, her answers were delightful!  Her answers varied from the expected ("Vera Rose," "Mommy," "Daddy") to the exquisitely 2-year-old ("Cookies and pie and pumpkin pie and presents for my birthday," to naming her favorite flavors of babyfood: "peas, carrots, banana-orange, and peaches").  I enjoyed praying with thanksgiving through my own jotted thoughts on my blessings which seem so numerous this year.  Vera Rose had only one comment when I asked her what she was thankful for: "elbows" so we now have a leaf denoting that body part, and after thinking on it, I am very glad that we can bend our arms.  I'm eager for Brian to return home from work because Liliana has a pile of blank leaves just waiting for his thoughts as well.  I'm so glad we have a holiday to remind us of our blessings and all that God has done and given us. 

       If you stop by, be sure to jot down your own thankful thoughts, whether here on this blog or on our little tree at home!  Happy Thanksgiving!

Sunday, November 11, 2012

Sneak Peak

Christmas card production in process...

      ...this year's it's my turn to create the Christmas card art (Brian and I alternate years) so this past week I've been carving the linoleum block.  Just a warning, though:  if you normally receive a Christmas card from me, I have decided that the zillions of hours spent laboriously hand printing 100 lino-cuts, then hand painting each one so that my loved ones can have a piece of my art each year may now be at an end.  I'm planning to find a short-cut this year--perhaps printing an artist's proof, then hand coloring it, then attaching the scanned image to the card or turning a photo of it into a card, etc.  Hopefully the simplifying won't take away from the art of it all too much!

Wednesday, November 7, 2012

Peppermint Paper-scrap Ornaments

Making Victorian-Style Paper Ornaments in Peppermint Stripe


Liliana with all the materials.
       Red and white peppermint swirls in shiny blown glass, sugared peppermint garlands, and jolly elves and Santas in red pinstripes will adorn my "Peppermint Swirl" themed tree for the Christmas display in the local historical museum's dining room next month.  After discussing the thematic possibilities (based on my tree collections) with the event coordinator, my original idea of a folk art, hand-carved Russian ornament tree was skipped over and we agreed that I'll be doing a peppermint swirl tree, with the only other specification:  that it be "elegant."  Red and white sparkly candy--not exactly historical or necessarily "elegant."  In fact, of all the tree decor collections I own (and yes, I adore decorating a variously-themed tree in every room--it's the one time of the year that I let myself embrace glorious items and set aside minimalism!), the peppermint tree is the one tree that I'm still developing, the one that seems a bit jarring next to all our antiques and the predominantly white/cream Christmas decor.  But I feel a childlike glee when I see those oh-so-modern shiny, sparkly peppermint bulbs, so I started collecting a few each year anyway.  I thought, "Perhaps in the kitchen?," or perhaps with my Department 56 North Pole Village that I collected as a child and is also sparkly and fun, or something.  I felt ridiculous collecting such bold decor and wondered if it was a mistake, but here I am with the event coordinator thinking that theme would be the best.

Some of the Christmas research books that gave me ideas.
       So, my goal now is to be sure I have enough of the decorations, to turn it into something "elegant" (perhaps even more in keeping with my "style" so that it doesn't jar me, and perhaps to add a historical touch to it, so that it will be more in keeping with the museum in which it will be showcased.  With that in mind, I was inspired by some of the Christmas research I've been conducting (for a presentation in December) and decided to make some Victorian-style paper ornaments, much as Victorian ladies often did in the evenings of their home.  They used elegant paper bits with faces and added crepe paper, cotton batting, trims, and thin wired tinsel to create very whimsical handmade ornaments. 

I made the bordered ornaments by pleating peppermint-striped
 wrapping paper and gluing a paper doll on top.
       I paged through our Betty Bonnet and Polly paper dolls and found a few with red and white outfits (a few are actually a reproduction from a Valentine party page), utilized a color-copier (yes, I realize that is so not authentic but the real deal scrap ornaments go for hundreds of dollars each), authentic antique lace pieces and trims, some red grosgrain ribbon, some peppermint-striped wrapping paper, cream-colored quilting thread, needle, scissors, and yes paste and had such fun!  I made borders around a few of them by corrugating (folding like a fan or pleating) the wrapping paper and then gluing it underneath the ornaments.  I attached the antique trims by hand sewing onto the paper dolls.  Liliana enjoys sitting next to me and periodically snatching my materials and wrinkling the paper dolls, but that was fine since the finished product is simply homey and fun.  Someday, I'd love to make some ornaments with antique china heads, or something more amazing, but this satisfies me for now.  I think it does bring a little more of the historical, the antique, and the elegant into a crazily candy-colored tree.  We will see how it turns out!


Examples of Victorian scrap ornaments.